
Siemens Induction Hob Operating Instructions: A Comprehensive Guide
Welcome! This guide details safe and efficient operation of your Siemens induction hob, ensuring optimal cooking performance and longevity of the appliance.
Siemens induction hobs represent a cutting-edge approach to cooking, offering unparalleled speed, efficiency, and safety. Unlike traditional cooktops, induction heating directly targets the cookware itself, rather than heating the surface of the hob. This innovative technology results in remarkably fast heating times and precise temperature control, enhancing your culinary experience.
These hobs utilize electromagnetic energy to create a magnetic field, which interacts with the ferromagnetic materials in compatible pots and pans. This direct heating method minimizes energy loss, making induction cooking significantly more energy-efficient. Siemens induction hobs are also renowned for their sleek designs and intuitive controls, seamlessly integrating into modern kitchens.
This guide will provide a comprehensive overview of your Siemens induction hob, covering everything from initial setup and basic operation to advanced features and maintenance procedures. Prepare to unlock the full potential of your appliance!
Safety Precautions
Prioritizing safety is paramount when operating your Siemens induction hob. Always ensure the hob is cool before cleaning, preventing burns from residual heat. Never use abrasive cleaners or scouring pads, as these can damage the glass ceramic surface. Keep flammable materials away from the cooking zones during and after use.
Individuals with pacemakers or other implanted medical devices should consult their physician before using an induction hob, as the electromagnetic field may cause interference. Supervise children closely when the hob is in operation, and prevent them from touching the surface. Damaged power cords or hob surfaces must be repaired by a qualified technician.
Do not attempt to disassemble or repair the hob yourself. Improper repairs can lead to electric shock or malfunction. Always disconnect the hob from the power supply before performing any maintenance. Following these precautions will ensure a safe and enjoyable cooking experience.
General Safety Warnings
This appliance is not intended for use by persons (including children) with reduced physical, sensory or mental capabilities, or lack of experience and knowledge, unless supervised by a responsible person. Children should be supervised to ensure they do not play with the appliance.
Always use cookware suitable for induction cooking – check for the induction compatibility symbol. Using incompatible cookware will not heat and may damage the hob surface. Avoid placing metal objects, such as knives or forks, on the hob surface, as they can become hot.
Never operate the hob without cookware present. Ensure the hob surface is clean and dry before use. Do not drag cookware across the surface, as this can cause scratches. Be cautious when deep-frying, as overheating oil can be a fire hazard. Always remain vigilant during cooking.
Specific Induction Hob Hazards
Induction hobs generate heat within the cookware itself, but the hob surface remains relatively cool. However, residual heat is present after cooking – the indicator light will illuminate. Avoid touching heating zones until the indicator has switched off to prevent burns.
Individuals with pacemakers or other implanted medical devices should maintain a safe distance from the operating hob. The electromagnetic fields generated by induction cooking may interfere with these devices. Consult your physician if you have concerns.
Do not use the hob surface as a work surface. Avoid placing flammable materials near the hob. Never attempt to repair the hob yourself; contact a qualified service technician for any repairs. Ensure proper ventilation during use, especially when cooking with oil or fat.
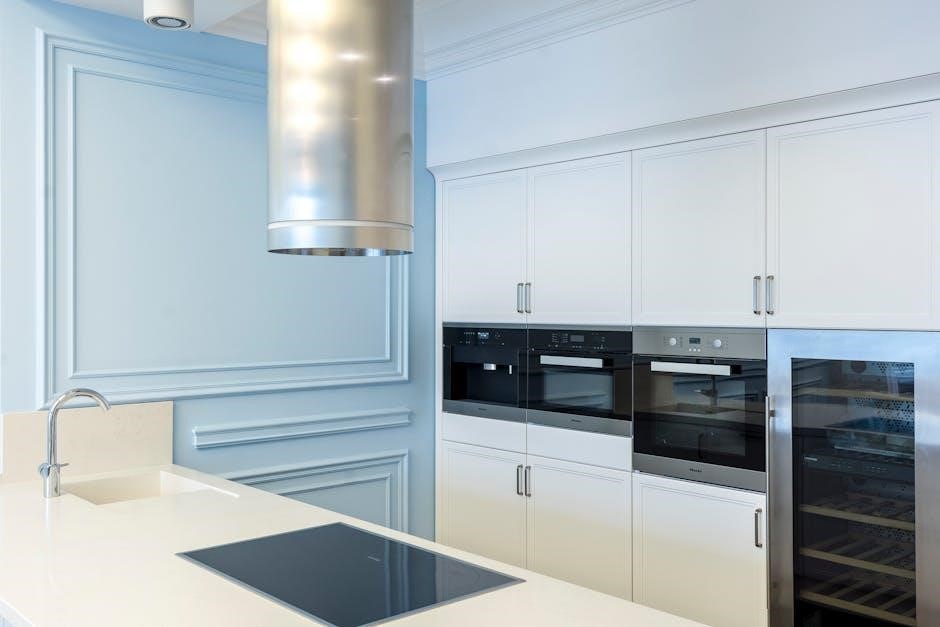
Understanding Your Siemens Induction Hob – Components
Your Siemens induction hob comprises several key components. The ceramic glass surface provides a durable and easy-to-clean cooking area. Beneath this lie the induction coils, which generate the magnetic field for heating. Heating zones, clearly marked on the surface, define the areas where cookware will be heated.
The control panel, typically touch-sensitive, allows you to manage all hob functions. Indicator lights display the status of each zone (active, standby, residual heat). A display screen provides information about selected settings and timers. The power button controls the overall hob operation.
Some models feature FlexInduction zones, offering greater flexibility in cookware size and placement. Familiarize yourself with the location of each component for safe and efficient use.
Control Panel Overview
The Siemens induction hob control panel is designed for intuitive operation. Typically, it features touch-sensitive buttons or a slider control. The power button, often marked with a circle and vertical line, turns the hob on and off. Zone selection buttons, often with symbols representing each heating area, activate individual zones.
“+” and “-” buttons or a slider adjust the power level for each zone, ranging from 1 (lowest) to 9 (highest). A timer button allows you to set cooking durations. Dedicated buttons may control special functions like PowerBoost or CookingSensor Fry.
Indicator symbols illuminate to show active zones, selected power levels, and timer status. A lock function, often represented by a key symbol, prevents accidental operation. Refer to the user manual for specific button layouts and functionalities for your model.
Heating Zones Explained
Siemens induction hobs utilize electromagnetic energy to heat cookware directly, offering rapid and efficient cooking. Heating zones are the circular or rectangular areas on the hob’s surface where you place your pots and pans. The size of a zone corresponds to the diameter of the base of the cookware it’s designed to heat effectively.
Some models feature standard zones, while others incorporate flexible zones (like FlexInduction) that can adapt to different cookware sizes. Dual-circuit zones offer two independently controlled heating areas within a single zone. It’s crucial to use cookware with a ferromagnetic base – meaning a magnet will stick to it – for induction to work.
The hob automatically detects when suitable cookware is present on a zone. Zones not in use remain inactive, enhancing safety and energy efficiency. Always match the cookware size to the zone size for optimal performance.
Indicator Lights & Symbols
Understanding the indicator lights and symbols on your Siemens induction hob is vital for safe and effective operation. A steady light typically indicates a zone is active, while a flashing light often signifies standby mode or a selected function. The PowerBoost symbol (often a ‘P’ or a star) shows when the PowerBoost function is engaged, delivering maximum heating power.
A timer symbol (clock icon) illuminates when a timer is set. The CookingSensor Fry symbol (a frying pan) indicates the CookingSensor is active. Error codes, displayed as numbers or letters, signal a problem requiring attention – consult the troubleshooting section for details.
Heat indicator lights remain on after cooking to show which zones are still hot, preventing accidental burns. Refer to your hob’s specific model documentation for a complete explanation of all symbols and their meanings.
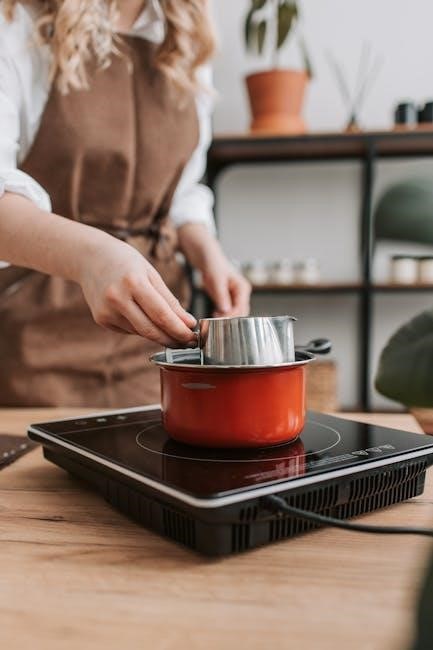
Getting Started: Initial Setup
Initial setup of your Siemens induction hob is straightforward, ensuring a smooth cooking experience. Before first use, carefully remove all packaging materials and protective films from the hob surface and control panel. Inspect the hob for any visible damage incurred during transport; if damage is present, do not connect to power and contact customer support.
Ensure the kitchen’s electrical system meets the hob’s power requirements (detailed in the specifications). Position the hob on a stable, level surface, allowing adequate ventilation around the appliance. Familiarize yourself with the location of the control panel and heating zones.
A thorough cleaning with a damp cloth and mild detergent is recommended before the first use to remove any manufacturing residues. Avoid abrasive cleaners that could scratch the glass ceramic surface.
Connecting to Power
Connecting to power requires careful attention to safety regulations. Before connecting, verify the voltage indicated on the hob’s rating label matches your household supply. Do not use extension cords or adapters; connect the hob directly to a grounded electrical outlet.
If your hob is designed for hardwiring, this must be performed by a qualified electrician, adhering to local electrical codes. Ensure the electrical connection is secure and properly insulated. After connection, switch on the circuit breaker.
The hob may briefly display indicators as it initializes. If the hob fails to power on, check the circuit breaker and the electrical connection. Never attempt to repair the electrical components yourself; contact a certified service technician for assistance.
First-Time Use & Cleaning
Prior to initial use, carefully remove all packaging materials and protective films from the hob surface and surrounding areas. Wipe down the entire surface with a damp, soft cloth and mild detergent to remove any manufacturing residue; Avoid abrasive cleaners, as they can scratch the glass ceramic surface.
For the first cooking session, it’s recommended to run each heating zone on a medium power level for a few minutes without any cookware. This helps to burn off any residual oils or substances. A slight odor may be noticeable during this process – this is normal and will dissipate quickly.
After this initial burn-in, the hob is ready for regular use. Always ensure the surface is clean and dry before each cooking session for optimal performance and safety.
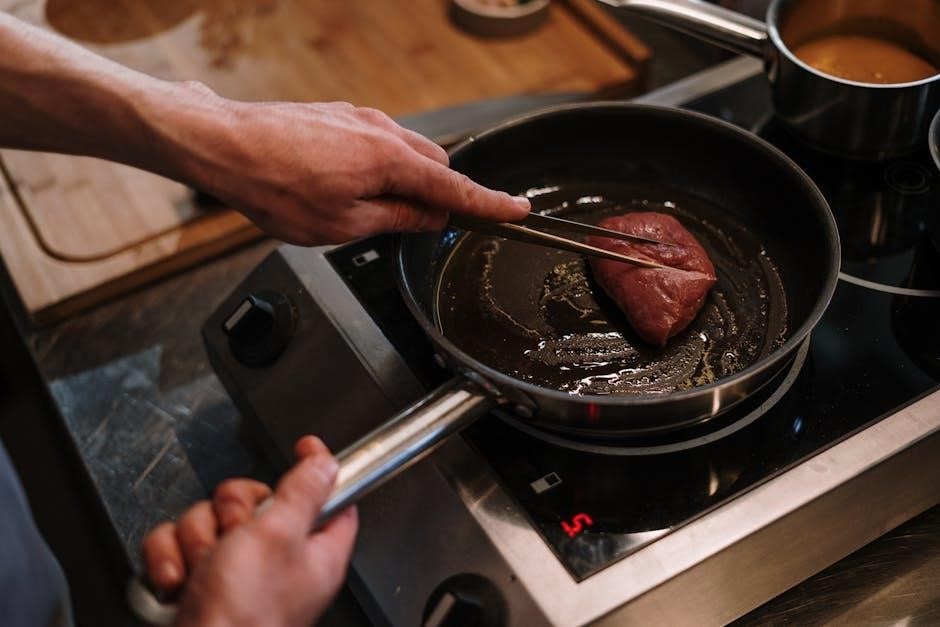
Basic Operation: Cooking with Induction
Induction cooking relies on magnetic fields to directly heat compatible cookware. Ensure your pots and pans have a ferromagnetic base – a magnet should stick firmly to the bottom. Place the cookware onto the desired heating zone.
To begin cooking, use the control panel to select the heating zone you wish to use. Then, choose your desired power level, ranging from 1 (lowest) to 9 (highest), or utilize pre-set cooking programs if available. The hob will automatically detect the presence of cookware and begin heating.
Adjust the power level as needed throughout the cooking process to maintain the desired temperature. Remember that induction heats cookware very quickly, so start with a lower setting and increase gradually.
Selecting a Heating Zone
Your Siemens induction hob features clearly defined heating zones, each independently controlled. To select a zone, simply touch the corresponding zone selection button on the control panel. The selected zone will typically be indicated by a visual cue, such as a highlighted outline or a flashing indicator light.
For hobs with FlexInduction, you can combine multiple zones into a larger, flexible cooking area. Activate the FlexInduction function and then define the desired shape and size of the combined zone using the control panel. This is ideal for larger cookware or irregularly shaped items.
Ensure the cookware is appropriately sized for the selected zone. Using a pot that is significantly smaller than the zone can result in inefficient heating and wasted energy.
Power Level Selection
Siemens induction hobs offer precise power control, typically ranging from 1 to 9, or sometimes using a sliding scale. Lower numbers represent gentler heat, ideal for simmering or keeping food warm, while higher numbers deliver rapid heating for boiling or searing.
To adjust the power level, use the “+” and “-” buttons associated with the selected heating zone. The current power level will be displayed on the hob’s control panel. Start with a medium power level and adjust as needed to achieve the desired cooking results.
Consider the type of food you are cooking when selecting a power level. Delicate sauces require lower settings, while thicker soups or stews benefit from higher heat. Experiment to find the optimal settings for your favorite recipes!
Timer Functionality
Siemens induction hobs feature versatile timer options, enhancing cooking convenience and preventing overcooking. You can set a timer for a single zone, or utilize a countdown timer independent of the cooking zones.
To set a zone timer, select the heating zone, then activate the timer function – often represented by a clock icon. Use the “+” and “-” buttons to specify the desired cooking duration. The hob will automatically switch off the zone when the timer reaches zero.
The countdown timer is useful for reminding you of tasks unrelated to a specific zone. Activate it, set the desired time, and the hob will alert you when it expires. Multiple timers may be available depending on the model.
Advanced Features & Functions
Siemens induction hobs boast innovative features beyond basic cooking. PowerBoost delivers intense heat for rapid boiling or searing, ideal for demanding recipes – use cautiously! FlexInduction zones intelligently adapt to various cookware sizes and shapes, offering unparalleled flexibility.
The CookingSensor Fry function automatically adjusts temperature to maintain optimal frying conditions, preventing burning and ensuring consistently delicious results. Some models include a warming function to keep cooked food at serving temperature.
Explore features like automatic pan detection, which activates the zone only when cookware is present, enhancing safety and efficiency. Refer to your specific model’s manual for a complete list and detailed instructions on utilizing these advanced capabilities.
PowerBoost Function
PowerBoost is a highly effective feature designed for rapid heating. It temporarily increases the maximum power output to a selected cooking zone, significantly reducing boiling times or accelerating searing processes. To activate PowerBoost, select the desired zone and press the corresponding PowerBoost symbol – often depicted as a ‘P’ within a circle.
An indicator light will illuminate, confirming activation. Note that PowerBoost is typically available only on larger zones and may be limited by your kitchen’s electrical capacity. Use PowerBoost judiciously, as it consumes considerable energy.
The function automatically deactivates after a set period, reverting to the previously selected power level. Always ensure sufficient liquid is present when boiling to prevent dry-boiling and potential damage.
FlexInduction Zone Usage
FlexInduction technology offers unparalleled cooking flexibility. These zones automatically detect the size and shape of your cookware, adapting the heating area accordingly. You can utilize the entire zone with one large pot, or simultaneously cook with multiple smaller pans placed anywhere within the designated area.
To use FlexInduction, simply place your cookware on the zone. The hob intelligently distributes power. Some models allow you to define specific zones within the FlexInduction area via the control panel, offering more precise control.
Remember that cookware must be induction-compatible for effective heating. The hob will only activate the area where suitable cookware is detected, conserving energy and ensuring safe operation.
CookingSensor Fry Function
CookingSensor Fry automates perfect frying results. This intelligent function monitors the oil temperature, adjusting heat to maintain your desired level – preventing burning and ensuring consistently delicious food. Select the appropriate food type (e.g., potato chips, meat, fish) on the control panel, and the hob will do the rest!
The sensor continuously measures the oil’s temperature and adapts the power output accordingly. A progress bar visually indicates the frying process. It’s crucial to use an appropriate amount of oil and ensure the pan is suitable for frying.
Important: Always supervise the frying process, even with CookingSensor Fry. Avoid overcrowding the pan, and follow recommended oil types for optimal results and safety.
Cleaning and Maintenance
Regular cleaning maintains your Siemens induction hob’s performance and appearance. Always ensure the hob is cool and disconnected from the power supply before cleaning. Use a soft cloth or sponge with warm, soapy water for daily cleaning. Avoid abrasive cleaners, scouring pads, or harsh chemicals, as these can damage the glass ceramic surface.
For stubborn stains, a dedicated ceramic hob cleaner is recommended – follow the product’s instructions carefully. Wipe the surface dry with a clean cloth to prevent watermarks. Do not immerse the hob in water or allow liquids to seep into the controls.
Preventative maintenance includes promptly addressing spills to avoid burnt-on residue. Regular cleaning extends the life of your appliance and ensures hygienic cooking.
Daily Cleaning Procedures
After each use, allow your Siemens induction hob to cool completely before initiating the daily cleaning process. Begin by removing any loose food particles or debris with a soft cloth. Next, dampen a clean, soft cloth or sponge with warm water and a mild dish soap solution.
Gently wipe the entire surface of the hob, paying attention to areas where spills or splatters occurred. Rinse the cloth frequently in clean water to avoid spreading grime. For light residue, this simple process is usually sufficient.
Finally, dry the hob thoroughly with a clean, dry microfiber cloth to prevent water spots and maintain a streak-free shine. Avoid using abrasive materials that could scratch the glass ceramic surface.
Dealing with Spills & Burnt Food
For fresh spills, immediately switch off the heating zone to prevent further burning. Use a clean, damp cloth to wipe away the spill while it’s still warm, but not scalding hot. Avoid using excessive water, as it could seep under the hob surface.
If food burns onto the surface, allow the hob to cool completely. Then, apply a specialized ceramic hob scraper, holding it at a 45-degree angle. Gently scrape away the burnt residue. Follow this with a cleaning solution designed for induction hobs, and wipe clean.
For stubborn, baked-on messes, a paste of baking soda and water can be applied, left for a few minutes, then gently scrubbed and wiped away. Never use abrasive cleaners or scouring pads, as they will damage the glass surface.
Troubleshooting Common Issues
Hob not turning on: Check the power supply, fuse, and ensure the hob is correctly connected. Error codes displayed: Consult the user manual for specific code meanings and recommended actions – often indicating sensor issues or incompatible cookware.
Uneven heating: Verify cookware is induction-compatible and has a flat base. Ensure the correct heating zone is selected and the power level is appropriate for the pan size. Flickering display: This may indicate a temporary power fluctuation; try resetting the hob.
Strange noises: Some humming or buzzing is normal, but loud or unusual sounds could signal a problem. If issues persist, disconnect the hob and contact Siemens customer support or a qualified technician for assistance. Do not attempt self-repair.
Frequently Asked Questions (FAQ)
Q: What cookware is compatible? A: Only induction-compatible pots and pans with a ferromagnetic base will work. Q: Can I use any extension cord? A: No, use a heavy-duty extension cord rated for the hob’s wattage. Q: How do I clean the surface? A: Use a soft cloth and designated induction hob cleaner; avoid abrasive materials.
Q: What does PowerBoost do? A: It provides a temporary, higher power output for faster heating. Q: Why isn’t the hob heating immediately? A: Induction heats the pan directly, so a slight delay is normal. Q: Is it safe to place items on the hob surface? A: No, the surface remains hot after use; avoid placing anything on it until cooled.
Q: Where can I find the model number? A: It’s located on the underside of the hob.